Instructions! All products come with limited hardware support, however we don’t offer support on assembly and configuration of hotspots and screens.
If you buy components from this website it is assumed that you have knowledge enough to build/configure a hotspot or screen or any other products.
Handy Information and FAQs
First Up! Instructions
Scroll to the bottom of this page for build/configuration videos for simplex hotspots.
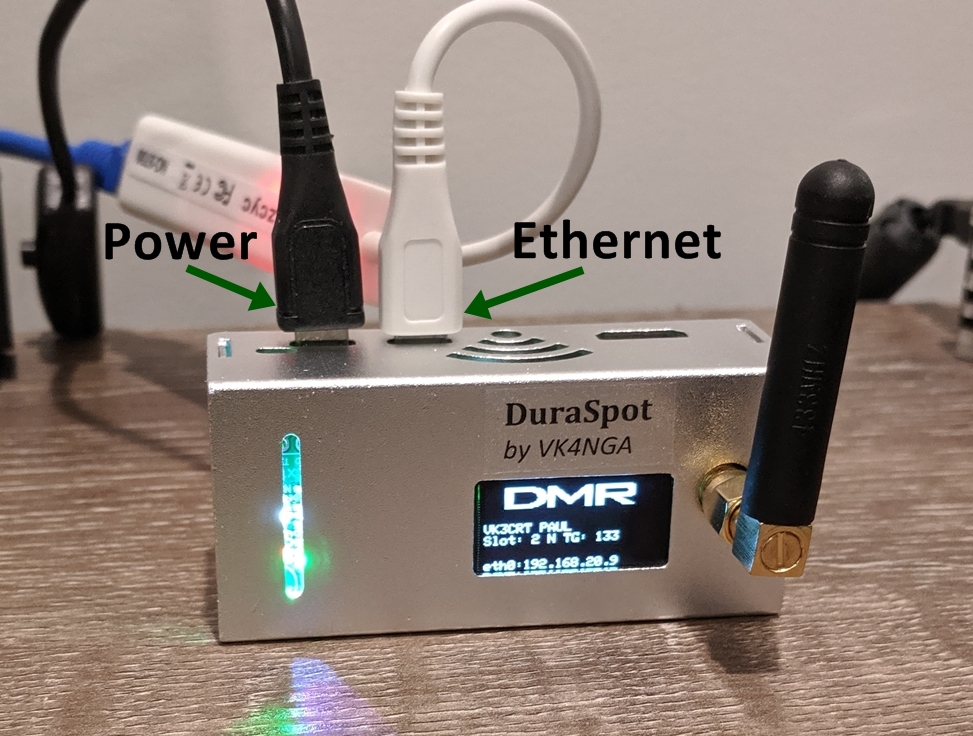
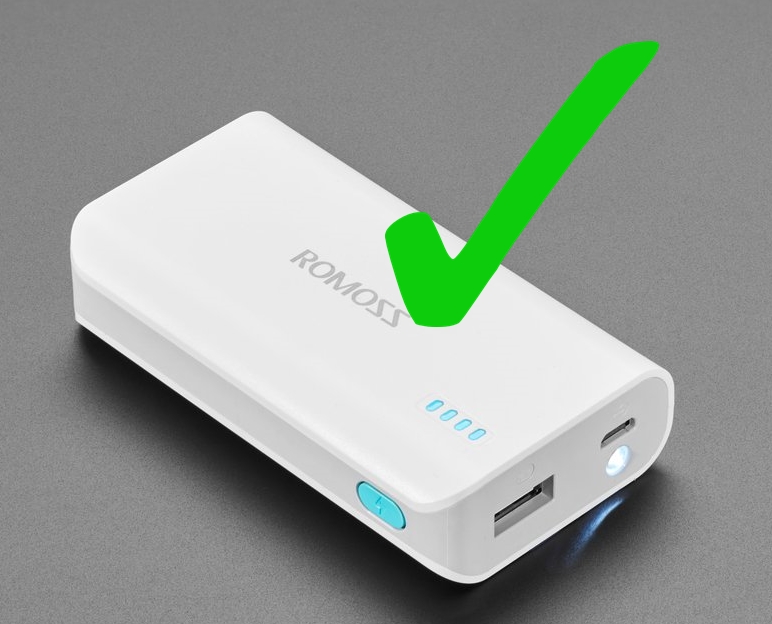
Once assembled, power your hotspot up using the correct port (see image) and use a quality power supply.
Be gentle with the micro USB port on your hotspot, it can easily be damaged. The power port is for power only, it has nothing to do with internet connection, that is done via WiFi.
After powering up wait 3-4 minutes for Pi-Star to fully expand and your hotspot to boot for the first time. *IMPORTANT* Do Not power your hotspot down during this process or you risk software corruption. *NOTE* Until you configure your hotspot, the screen will not display anything.
Particularly If possible, it’s best to leave your hotspot running continuously as updates will run automatically each night. If you power the hotspot down during RX/TX you risk corruption of the SD card.
Instructions: If you plug the power into the wrong port you risk cooking your new hotspot!
The Two Biggest Issues you are likely to encounter are:
1) Incorrect radio programming so the radio doesn’t communicate with the hotspot.
2) Poor or no internet connection to the hotspot.
IMPORTANT WiFi NOTES:
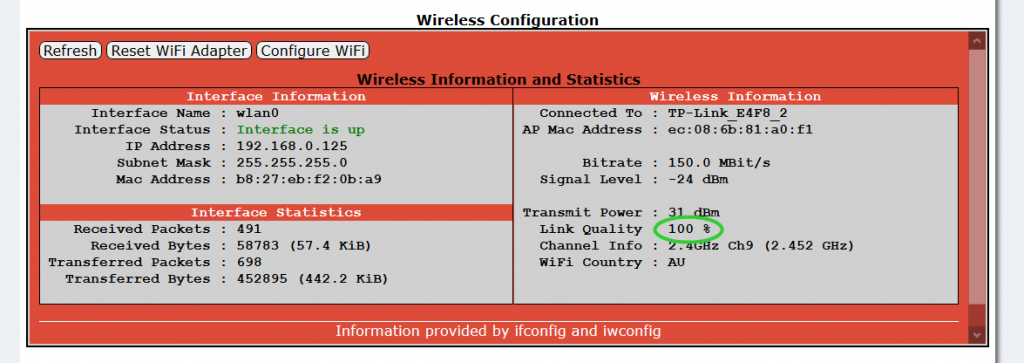
The hotspot’s WiFi has has a very small antenna/range so it will be imperative that your WiFi router be located in your shack or very close by, otherwise it simply won’t connect properly to the internet. Even if it’s only a few metres away, the WiFi signal quality can be affected. Once you set up your hotspot, you can place it beside your WiFi router or alternatively buy a WiFi range extender for your shack instructions. For it to operate properly you need a link quality of at least 85%.
The image below shows a perfect strong connection with a link quality of 100%.
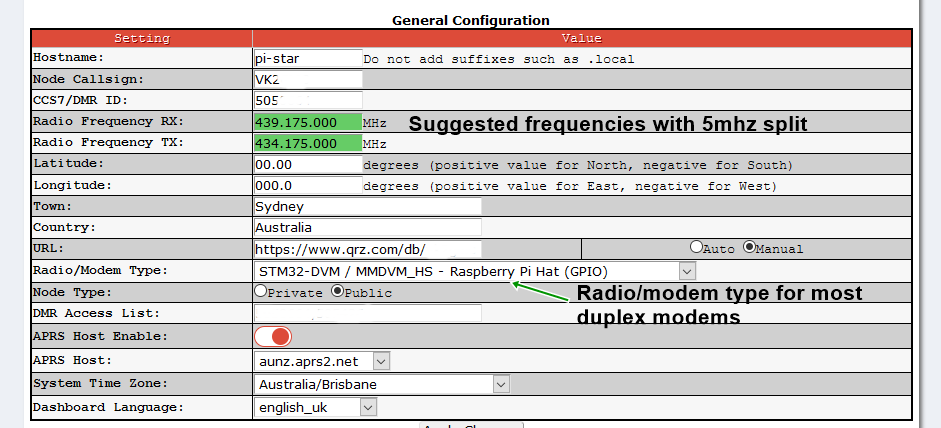
Duplex Hotspot Configurations:(Instructions)
The images below show the differences in configuration for Duplex, otherwise the rest of the configuration is the same as in the video below.
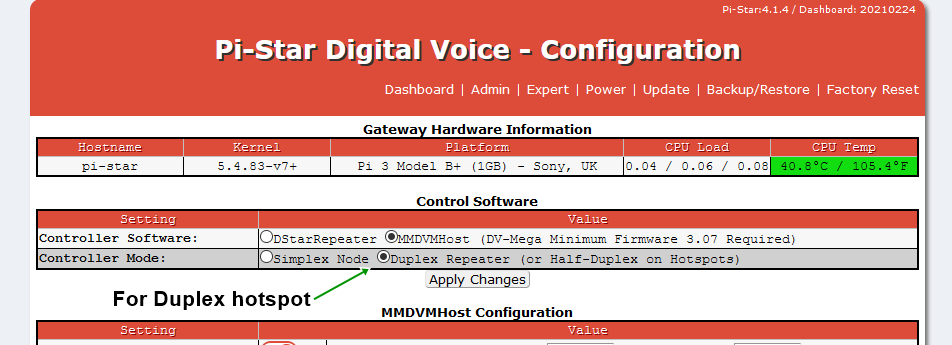
Remember the RX/TX frequencies in your radio codeplug for duplex are opposite to the hotspot.
DMR radio setup:(Instructions)
Each radio use on the DMR network programmed with a unique user ID number.
You MUST enter your DMR ID into your radio and hotspot for it to work correctly.
ID numbers manage centrally, and may obtained here: https://www.radioid.net/register#
All of the channels that you set up in your codeplug to access any of the DMR networks must be set up simplex and need to have a talk group and matching receive group assigned, also please select the low power setting in each channel.
Make sure you create a receive group for TG9 and add TG9 to it. This way you’ll be able to hear the hotspot’s voice announcements, which are sent to TG9.
An excellent website to get you started: https://vkdmr.com/
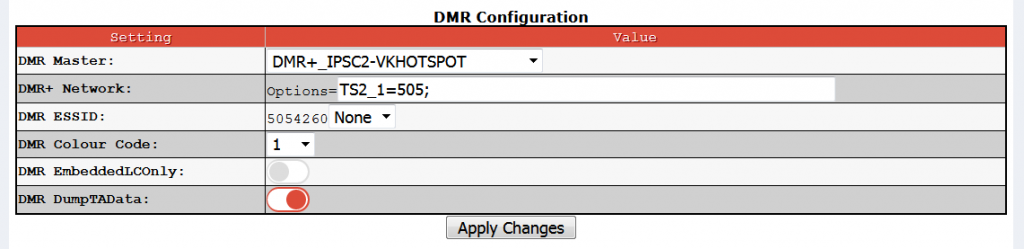
VK-DMR network configuration in your Hotspot:
Set the server as in the image below. *IMPORTANT* You must run “update” before this configuration setting will work.
You should set TG505 as a static talk group, copy and paste the text below into options:
TS2_1=505;
Then apply changes.
Brandmeister network configuration in your Hotspot:
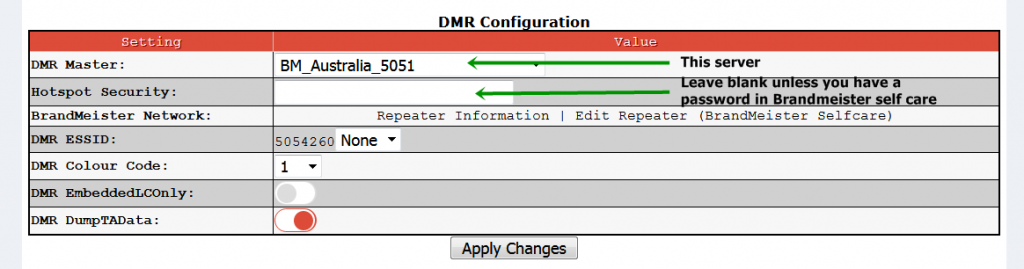
We don’t recommend using the DMR Gateway feature!
Yaesu radio setup for YSF:
Using the FT70, FT2D/3D FTM100/400 or similar you need to set up a simplex channel to the hotspot frequency in DN mode.
By the hotspot, switch off other modes and switch on YSF.
YSF startup host the busy reflectors are FCS00420 CQ-UK and FCS00390 America link so select the one you want.
Switch on WiresX passthrough in your hotspot. That allows you to control the hotspot via the wires X button on the radio.
If using an FT70D then switch on Uppercase Hostfiles, apply changes then run Update.
You can direct enter the reflector, press Search & Direct -> ID-> then enter the reflector number.
Video here: https://www.youtube.com/watch?v=Y4lyLn2nYgI
You can see the YSF reflector list here: https://www.pistar.uk/ysf_reflectors.php
Please Note: If you are running an FT991/A the RX audio quality on C4FM is quite poor. This is a trait of the radio although the latest firmware has improved this.
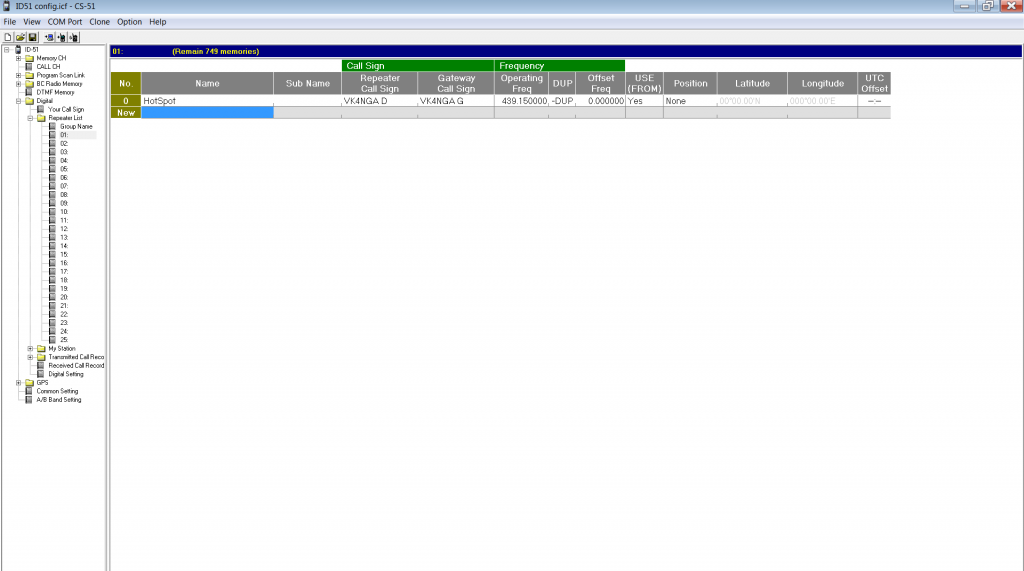
D-Star radio setup:
Below is a screenshot of how you should set your radio’s D-Star hotspot channel up.
It needs to be setup as a duplex channel on the hotspot’s frequency with zero offset. The repeater callsign needs to match your registration setup. You should set it up like this: VKxxxx(space)D. The gateway callsign is treat the same way only it has a “G” suffix.
Here are videos about reflector memory setup and use in Icom radios using the “your (UR) call” memory:
Notes about BER (bit error rate) and offset adjustment:
Modem boards come test so a zero offset (which is the default setting in Pi-Star) is all that is needed. The TCXO (oscillator) that is used in the modem combined with a quality radio chip means that in almost all cases your radio will communicate with the hotspot with very low BER. If you do find that the BER is not in the green zone then please contact us for support before doing anything.
Running multiple modes in Pi-Star:
The pi-star software allows you to turn on multiple modes at the same time, for example DMR, DStar & YSF. Then Pi-Star scans all active modes that you have selected. When it picks up a signal it stops on that mode. If someone is talking on DMR, then the Pi-Star stops on DMR and stays there so if you wanted to talk on D-Star at this point, you cannot as DMR is already in use. That’s where the hang time in the configuration applies.
So….if you run multiple modes then Pi-Star can hijack the qso you are listening to if there is a decent enough pause and another mode becomes active.
Using other power sources to power up your hotspot:
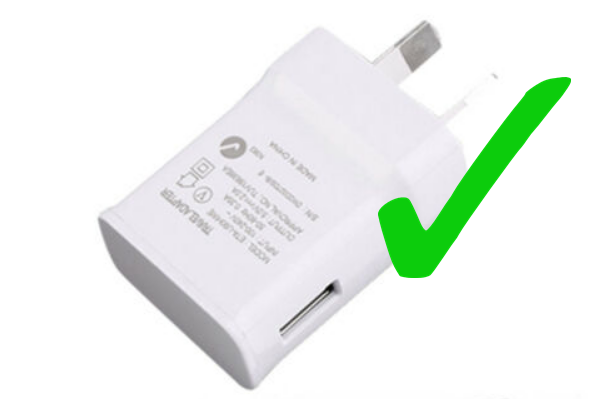
Please only use quality power supplies. Many devices around your home have USB ports but most are low current, not enough to run your hotspot.
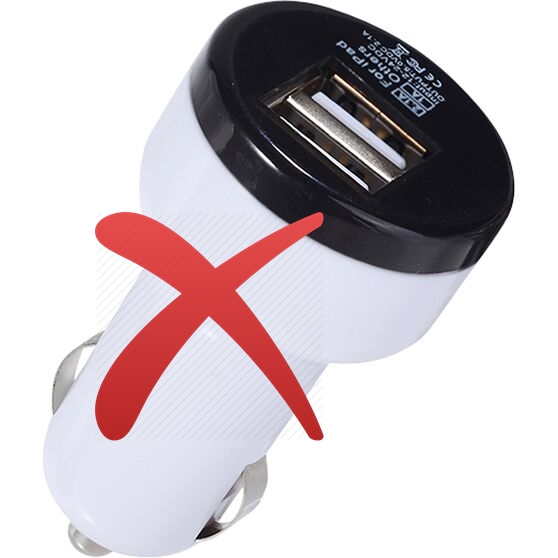
If mobile or portable it is advisable to use a battery bank only. Do not use a cigarette lighter USB adapter or your car’s USB ports. These ports designed to charge batteries and in many cases output more than the required 5 volts. Using these will cause damage to your hotspot.
VK4NGA Multi-Layer Hotspot Case Instructions
Tip… everything finger tight until completely assembled.

Below are some useful videos that may help you with hotspot assembly and configuration.
Hotspot Assembly Instructions by VK4NGA:
Video 1:
Video 2:
Video 3:
Pi-Star Setup Tutorial by 2E0KZA